Concrete Toppings and Overlays Guide for Contractors | Projul
If you have been doing concrete work for any length of time, you know that ripping out and replacing a slab is expensive, time-consuming, and disruptive for the client. That is exactly why concrete toppings and overlays have become such a big part of the business. They let you transform a worn, stained, or damaged slab into something that looks brand new at a fraction of the replacement cost.
But overlays are not a magic fix. The wrong product on the wrong substrate, bad surface prep, or poor timing will give you a project that peels, cracks, or delaminates within months. This guide covers what you need to know to pick the right overlay system, prepare the surface correctly, install it properly, and avoid the mistakes that lead to callbacks.
Whether you are resurfacing a residential driveway, refinishing a commercial warehouse floor, or adding a decorative finish to a patio, the fundamentals covered here apply across the board.
Types of Concrete Toppings and Overlays
Not all overlays are created equal, and picking the wrong one for the job is where a lot of contractors get into trouble. Here is a breakdown of the main categories you will run into.
Polymer-Modified Overlays
These are the workhorses of the overlay world. A polymer-modified overlay uses a cement-based mix with added polymers (usually acrylic or latex) that improve bonding, flexibility, and durability. They go down at 1/4 to 3/4 inch thick and can be troweled, sprayed, or squeegeed depending on the product. Most exterior resurfacing jobs, from pool decks to driveways, use some form of polymer-modified overlay.
Micro-Toppings
Micro-toppings are ultra-thin overlays, typically applied at 1/32 to 1/16 inch thickness. They are not structural at all. Their job is purely cosmetic, giving you a smooth, clean canvas that you can stain, dye, or seal for a polished look. They work well on interior floors where the existing slab is sound but ugly. If you are doing decorative work, micro-toppings pair nicely with the techniques covered in our concrete polishing and decorative finishes guide.
Self-Leveling Overlays
When you have a floor that is wavy, uneven, or out of level, a self-leveling overlay solves the problem without grinding. These products flow out and find their own level, curing into a flat, smooth surface. They typically go down at 1/4 to 1 inch thick. Commercial and industrial projects use them frequently before installing flooring or coatings. The key is getting the primer right and working fast because most self-levelers start setting within 15 to 20 minutes.
Stamped Overlays
Stamped overlays give you the look of stamped concrete without tearing out the old slab. You apply a stampable overlay mix at 1/4 to 3/8 inch, then press texture mats into the surface just like you would with fresh concrete. You can get patterns that mimic stone, brick, slate, or wood plank. The finish work ties directly into your concrete finishing skills, so crews experienced with traditional stamping pick this up quickly.
Epoxy and Urethane Systems
These are resinous coatings rather than cementitious overlays, but they show up on the same bid sheets. Epoxy floors are popular in garages, warehouses, and commercial kitchens. Urethane topcoats add UV stability and chemical resistance. They bond directly to prepared concrete and build up in thin mil layers. They are a different animal from cement-based overlays, so make sure your crew knows the difference before bidding.
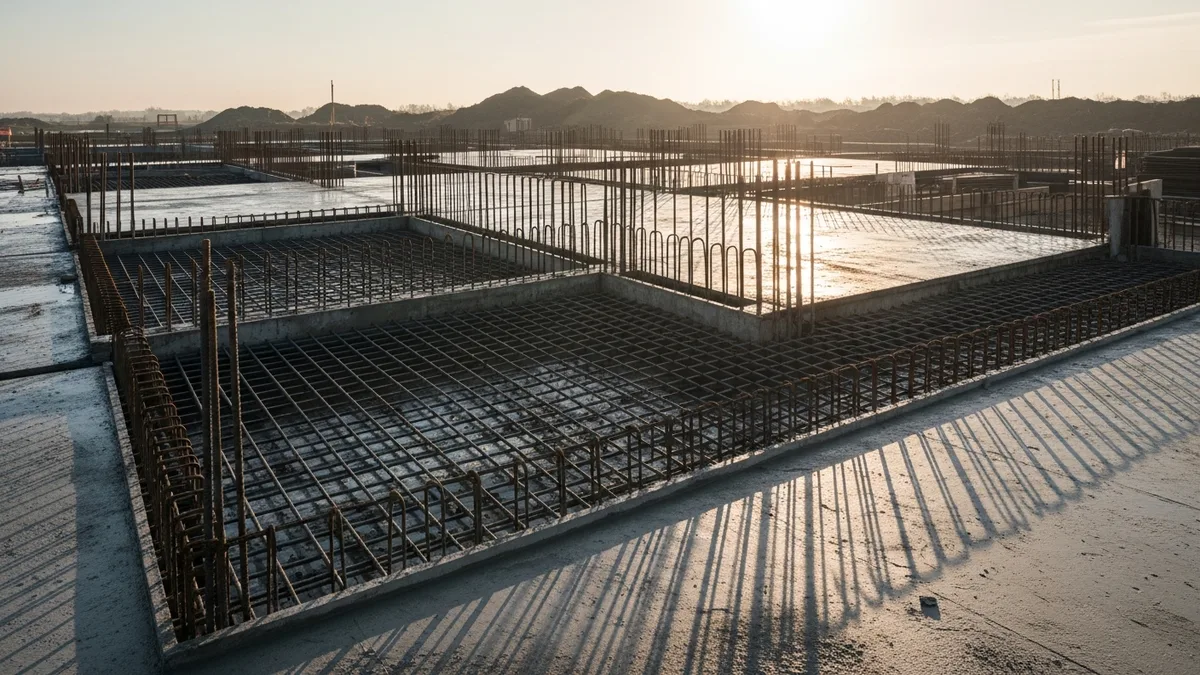
Concrete Toppings (Bonded and Unbonded)
True concrete toppings are thicker applications, typically 3/4 inch to 2 inches, that use standard or modified concrete mixes. Bonded toppings adhere directly to the existing slab and share the load. Unbonded toppings sit on a bond-breaker membrane and act as an independent slab. You will see unbonded toppings on parking structures and bridge decks where the old surface needs protection but the topping needs to move independently. Getting the concrete mix design right is critical for topping performance.
Surface Preparation: The Step That Makes or Breaks the Job
Ask any overlay manufacturer what causes the most failures, and they will tell you the same thing: bad surface prep. You can have the best product in the world, but if the substrate is not ready, that overlay is coming off.
Evaluating the Existing Slab
Before you commit to an overlay, you need to assess the condition of what is underneath. Walk the slab and look for:
- Structural cracks that move or shift (these will telegraph through any overlay)
- Delamination or hollow spots (tap with a hammer or chain drag to find them)
- Moisture issues (tape a plastic sheet to the slab for 24 hours and check for condensation)
- Previous coatings, sealers, or curing compounds that could block adhesion
- Significant spalling or surface deterioration
If the slab has serious structural problems, no overlay will fix it. You need to address the underlying issues first, and our structural concrete repair guide covers that process in detail.
Mechanical Preparation Methods
The goal of surface prep is to create a clean, open-pored profile that the overlay can grip. The industry standard is the International Concrete Repair Institute (ICRI) Concrete Surface Profile (CSP) system, which rates surface roughness on a scale of 1 to 10. Most overlays need a CSP of 2 to 5.
Common prep methods include:
- Shot blasting removes coatings and creates a uniform profile in one pass. It is the go-to for large floor areas.
- Diamond grinding smooths high spots and creates a consistent profile. Good for leveling work before self-levelers.
- Scarifying uses rotating cutters to remove thick coatings or deteriorated concrete. More aggressive than grinding.
- Pressure washing at 3,500+ PSI removes loose material and contaminants. Not a substitute for mechanical profiling, but a necessary cleaning step.
- Acid etching was common years ago but has fallen out of favor. It is inconsistent, creates hazardous waste, and most overlay manufacturers no longer recommend it.
Primers and Bonding Agents
Most overlay systems require a primer or bonding agent between the substrate and the overlay. This is not optional. The primer seals the pores of the substrate to prevent moisture from pulling away from the overlay, and it creates a chemical bridge between the old concrete and the new material. Follow the manufacturer’s instructions exactly on coverage rate and open time. Applying the overlay too soon (before the primer tacks up) or too late (after it skins over) will cause bond failure.
Installation Best Practices
Once your surface is prepped and primed, the installation itself needs to go smoothly. Overlays are less forgiving than full-depth concrete because you are working with thinner sections and tighter timing windows.
Mixing
Batch consistency matters more with overlays than with regular concrete. Small variations in water content show up as color differences and performance issues. Use a measured amount of water every time. A jiffy mixer or mortar mixer works for small batches, but larger projects need a continuous mixer or mixing station.
Application Techniques
The technique depends on the product:
- Trowel-applied overlays go down with a gauge rake to set thickness, then get finished with a steel or magnesium trowel. Work in sections and keep a wet edge to avoid cold joints.
- Spray-applied overlays use a hopper gun or texture sprayer. These are common for exterior knockdown and orange peel finishes. Keep the gun distance and air pressure consistent.
- Self-leveling overlays get poured and spread with a gauge rake, then a spike roller removes air bubbles. You have a very short working time, usually 15 to 20 minutes, so have your crew positioned and ready before you start pouring.
Timing and Conditions
Temperature and humidity affect every overlay product differently, but some rules apply across the board:
- Substrate temperature should be between 50 and 90 degrees Fahrenheit. Cold slabs slow curing and can cause bond failure. Hot slabs pull moisture from the overlay too fast.
- Do not apply overlays in direct sunlight on hot days. The surface will skin over before the material underneath has time to bond and cure.
- Wind accelerates moisture loss. If you are working outdoors on a windy day, you will need to adjust your timing and possibly use evaporation retarders.
- Humidity below 40% speeds up drying and can cause shrinkage cracking. Humidity above 80% slows curing and can trap moisture.
Not sure if Projul is the right fit? Hear from contractors who use it every day.
These conditions matter for the overlay just like they matter for concrete curing on any pour.
Joints
Honor every existing joint in the substrate. If there is a control joint, expansion joint, or construction joint in the slab below, you need to carry it through the overlay at the same location. Failing to do this is a guaranteed crack. Cut the joints with a diamond blade after the overlay has set but before it fully cures, or use joint strips placed during installation.
Cost Factors and Estimating Overlay Projects
Pricing overlay work requires a different approach than bidding a new slab pour. The variables are different, and the labor component shifts toward prep work rather than forming and finishing.
Material Costs
Material costs vary widely by product type:
- Basic polymer-modified overlays: $0.50 to $1.50 per square foot for material
- Micro-toppings: $0.75 to $2.00 per square foot
- Self-leveling overlays: $1.00 to $3.00 per square foot
- Stamped overlay systems: $1.50 to $4.00 per square foot (including release agents and sealers)
- Epoxy systems: $1.50 to $5.00 per square foot depending on build thickness
Labor Breakdown
Here is where overlay projects differ from new concrete. Your labor hours break down roughly like this:
- Surface preparation: 30 to 40% of total labor
- Priming and bonding agent application: 5 to 10%
- Overlay mixing and application: 30 to 40%
- Finishing, texturing, or stamping: 10 to 20%
- Sealing and cleanup: 5 to 10%
Notice that surface prep eats up the biggest chunk. If you underestimate prep time, your margins disappear fast. Tracking labor hours accurately with construction project management software helps you refine your estimates over time and catch projects that are running over budget before they get away from you.
Factors That Affect the Bid
When putting together your numbers, account for:
- Condition of the existing slab (more damage means more prep)
- Access and logistics (second floor, tight spaces, occupied buildings)
- Product selection and finish complexity
- Square footage (larger projects have lower per-square-foot costs)
- Climate and season (cold weather may require heating or enclosures)
- Number of coats or layers required
- Sealer type and number of coats
Build your estimates with clear line items so the client understands what they are paying for and so you can track actual costs against projected costs on every job.
Common Mistakes and How to Avoid Them
After seeing hundreds of overlay projects, both successful and failed, certain patterns show up again and again. Here are the mistakes that cause the most trouble.
Skipping the Moisture Test
Moisture is the number one enemy of concrete overlays. If the slab has excessive moisture vapor transmission, the overlay will not bond properly. It will bubble, peel, or delaminate. Always test moisture levels using calcium chloride tests (ASTM F1869) or relative humidity probes (ASTM F2170) before starting any overlay project. This takes 24 to 72 hours, so plan for it in your project schedule.
Inadequate Surface Prep
We already covered this, but it bears repeating because it is the most common failure point. A pressure washer alone is not surface prep. You need mechanical profiling to the manufacturer’s recommended CSP. If you are unsure, call the manufacturer’s technical support line. They would rather spend 10 minutes on the phone with you than deal with a warranty claim.
Wrong Product for the Application
Using an interior micro-topping on an exterior patio exposed to freeze-thaw cycles will fail. Applying a rigid overlay over a slab that has active movement will crack. Every product has a specific set of conditions it is designed for. Read the technical data sheet completely before specifying or installing any overlay system.
Ignoring Temperature and Humidity Limits
Every product has a recommended installation temperature range. Pushing outside that range, whether too hot or too cold, leads to curing problems, adhesion failure, and cosmetic defects. Plan your work around the weather. Sometimes that means starting at 5 AM in the summer or setting up temporary heating in the winter.
Applying Too Thick or Too Thin
More is not always better with overlays. Applying a product thicker than its rated range can cause shrinkage cracking and delamination. Applying it too thin leaves you with weak spots and inconsistent coverage. Use depth gauges and pay attention to spread rates.
Not Sealing the Finished Surface
An unsealed overlay absorbs stains, moisture, and contaminants. Within months it looks worn and dirty. Within a year or two, it starts deteriorating. Sealing is part of the job, not an upsell. Include it in every bid and make sure the client understands the maintenance schedule.
Scheduling and Managing Overlay Projects
Overlay projects have unique scheduling challenges compared to standard concrete work. The phased nature of the work, with prep, priming, application, curing, and sealing each requiring specific time windows, means you cannot just show up and power through it in one day.
Typical Project Timeline
A standard residential overlay project (driveway, patio, or pool deck) follows a timeline roughly like this:
- Day 1: Evaluation, moisture testing setup, material delivery
- Day 2: Surface preparation (shot blasting, grinding, crack repair)
- Day 3: Primer application, overlay application, texturing or stamping
- Day 4: Curing time (no foot traffic)
- Day 5: Sealer application
- Day 6 to 7: Full cure before vehicle traffic
Commercial projects scale up from there. A 10,000-square-foot warehouse floor might need two weeks from start to finish, with multiple overlay pours and sealer coats.
Crew Coordination
Overlay work requires smaller, more skilled crews than standard pours. A three to four person crew can handle most residential overlay projects. You need:
- A lead who understands the product system and controls the timing
- One or two people mixing and transporting material
- One or two people applying, spreading, and finishing
Keeping your construction schedule tight and your crew assignments clear prevents the kind of miscommunication that leads to cold joints, missed cure windows, and rework.
Weather Planning
Unlike a covered interior job, exterior overlay work is at the mercy of the weather. Rain within the first 24 hours will ruin an overlay. Temperatures dropping below 50 degrees overnight can stall curing and weaken the bond. Build weather contingency days into your schedule and communicate clearly with the client about potential delays.
Quality Control Checkpoints
Build these checkpoints into every overlay project:
- Substrate evaluation complete and documented
- Moisture test results reviewed and within limits
- Surface prep verified (CSP profile confirmed)
- Primer applied at correct coverage and tack verified
- Overlay mixed to correct consistency and applied within working time
- Joints honored and cut
- Curing conditions monitored
- Sealer applied at recommended coverage
Documenting these checkpoints protects you if there is ever a dispute about workmanship. Take photos at each stage. Use your project management tools to log the conditions, materials, and crew on every job.
Book a quick demo to see how Projul handles this for real contractors.
Running a concrete overlay business profitably means tracking every detail from the first site visit through the final sealer coat. Contractors who combine solid field skills with construction management software built for the trades find it a lot easier to keep projects on schedule, catch cost overruns early, and deliver consistent results that generate referrals. That is how you build a reputation as the crew clients call first.