Fire Sprinkler System Installation: Wet vs Dry Systems, Pipe Sizing, and Code Requirements | Projul
Fire sprinkler systems are one of those building components that nobody thinks about until they are needed. But for contractors, getting the installation right is a big deal. Sprinkler work touches structural framing, mechanical systems, electrical coordination, and fire code compliance all at once. A mistake during installation can mean a failed inspection, a flooded building, or worse.
Whether you are a general contractor coordinating with a fire protection sub, or a fire protection contractor looking for a refresher, this guide walks through the essentials: system types, pipe sizing, code requirements, and the real-world mistakes that cause problems on job sites.
Understanding Fire Sprinkler System Types
There are four main types of fire sprinkler systems. Each one fits different building conditions and hazard levels.
Wet Pipe Systems
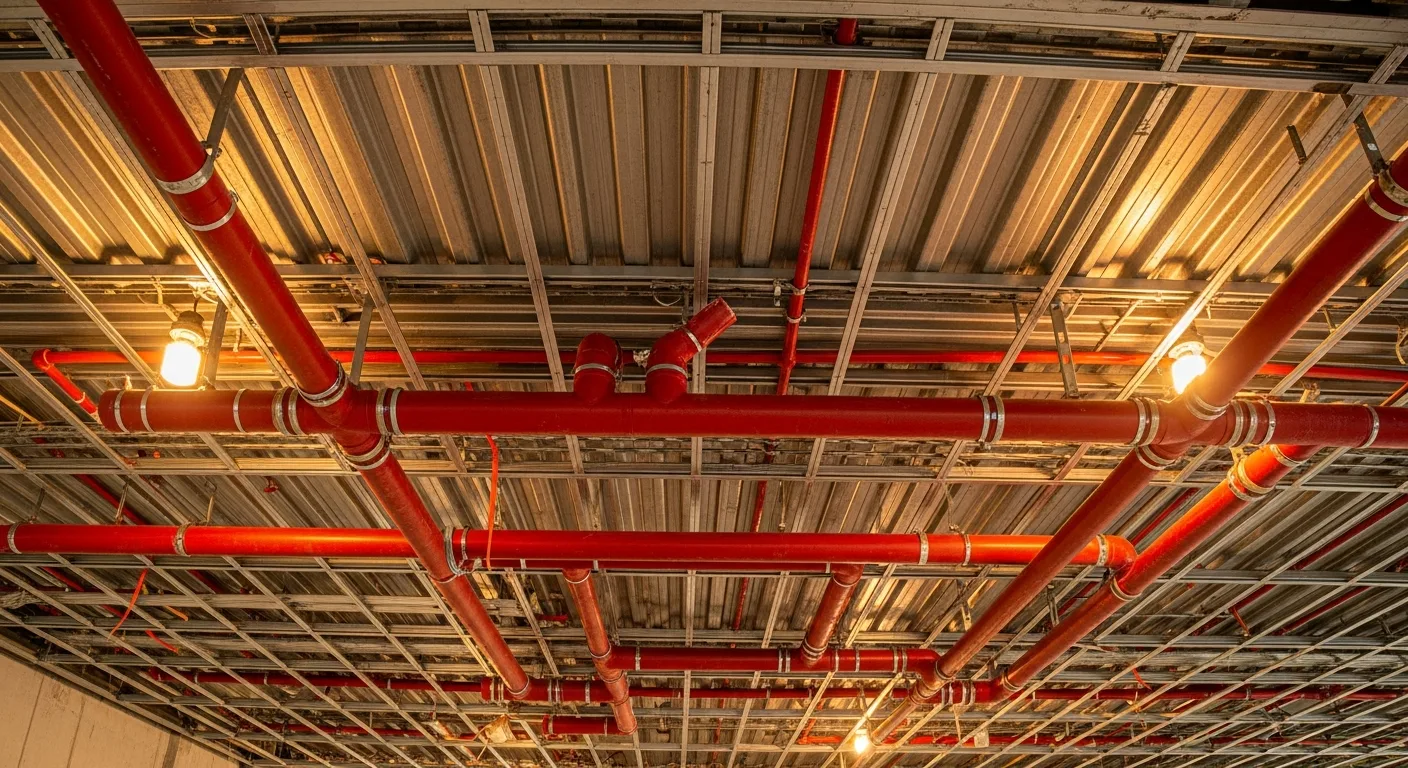
Wet pipe systems are the most common type, making up roughly 70% of all installations. The piping is filled with pressurized water at all times. When a sprinkler head reaches its activation temperature, the heat-sensitive element (a glass bulb or fusible link) breaks, and water flows immediately.
Best for: Heated and climate-controlled spaces, offices, retail stores, apartments, schools, and most commercial buildings.
Advantages:
- Simplest design and lowest installation cost
- Fastest response time since water is already at the head
- Fewest mechanical components to maintain
- Most reliable system type overall
Limitations:
- Cannot be used where pipes might freeze
- Not suitable for areas where accidental water discharge would cause serious damage to sensitive equipment
Dry Pipe Systems
Dry pipe systems use pressurized air or nitrogen in the piping instead of water. When a head activates, the air pressure drops, which opens a dry pipe valve that floods the system with water.
Best for: Unheated warehouses, parking garages, loading docks, freezer buildings, and any space where temperatures drop below 40 degrees Fahrenheit.
Advantages:
- No risk of frozen, burst pipes in cold environments
- Can protect spaces that are impractical to heat
Limitations:
- Slower response time (up to 60 seconds for water to reach the head)
- More expensive to install and maintain
- Requires an air compressor or nitrogen generator
- Dry pipe valve and air maintenance equipment need regular service
- Maximum system size is limited (typically 750 gallons)
Pre-Action Systems
Pre-action systems are a hybrid. The pipes are dry, but the system requires two triggers before water flows: first, a detection system (smoke or heat detector) activates and opens the pre-action valve to fill the pipes; then, an individual sprinkler head must also activate.
Best for: Data centers, museums, libraries, telecom rooms, and any space where accidental water discharge would be catastrophic.
Advantages:
- Double-interlock reduces the chance of accidental discharge to near zero
- Pipes are dry, so a broken pipe does not cause flooding
Limitations:
- Most expensive and complex system type
- Requires both sprinkler and detection systems
- More components to maintain and test
Deluge Systems
Deluge systems have open sprinkler heads (no heat-sensitive element). All heads are connected to a deluge valve that is held closed by a detection system. When the detection system triggers, the valve opens and water flows from every head simultaneously.
Best for: High-hazard areas where fire can spread extremely fast, like chemical storage, aircraft hangars, and power generation facilities.
Advantages:
- Applies water across the entire protected area instantly
- Can handle fast-spreading, high-intensity fires
Limitations:
- Massive water demand requires large supply mains
- All heads discharge at once, which means significant water damage
- Complex detection and valve systems
Pipe Sizing Fundamentals
Getting pipe sizes right is critical. Undersized pipes will not deliver enough water to control a fire. Oversized pipes waste money and take up valuable space above the ceiling.
Hydraulic Calculations
Modern sprinkler systems are designed using hydraulic calculations rather than pipe schedule methods (though pipe schedule is still allowed for small, simple systems under NFPA 13). Hydraulic calculations determine the exact pipe sizes needed based on:
- Design density: The amount of water per square foot required by the hazard classification (measured in gallons per minute per square foot)
- Design area: The assumed area of sprinkler operation (typically 1,500 to 5,000 square feet depending on hazard)
- Friction loss: Pressure lost as water moves through pipes, fittings, and valves
- Available water supply: What the municipal main or fire pump can deliver
A qualified designer runs these calculations using specialized software. The output is a set of pipe sizes that ensures every head in the design area gets its required flow and pressure.
Common Pipe Materials
- Steel (black or galvanized): The traditional choice. Schedule 10 and Schedule 40 are most common. Galvanized is used in wet systems to reduce corrosion.
- CPVC: Approved for light hazard occupancies in certain configurations. Lighter, easier to install, and does not corrode. Cannot be used in concealed spaces above ceilings without specific listings.
- Copper: Used in some residential applications. Expensive but corrosion-resistant.
Typical Pipe Sizes
For most light and ordinary hazard commercial systems:
- Branch lines (feeding individual heads): 1 inch to 1-1/2 inches
- Cross mains (feeding branch lines): 2 inches to 3 inches
- Feed mains and risers: 3 inches to 6 inches
- Underground supply: 6 inches to 8 inches
These are general ranges. Your hydraulic calculations determine the actual sizes.
Pipe Hanging and Support
NFPA 13 has detailed requirements for how sprinkler pipe must be supported:
- Hangers must be within 12 inches of each change of direction
- Maximum hanger spacing varies by pipe size (typically 12 to 15 feet for steel pipe)
- Pipe must be braced for seismic loads in seismic zones
- Hangers must be attached to structural members, not to other building systems like ductwork or electrical conduit
Seismic bracing is a major cost factor in earthquake-prone regions. Four-way bracing of mains and two-way bracing of branch lines adds significant labor and material.
NFPA Code Requirements You Need to Know
Fire sprinkler codes are detailed and specific. Here are the key standards and requirements that affect installation work.
NFPA 13: Standard for the Installation of Sprinkler Systems
This is the primary standard for commercial and industrial sprinkler systems. Key provisions include:
- Hazard classification: Buildings are classified as Light Hazard, Ordinary Hazard (Group 1 or 2), or Extra Hazard (Group 1 or 2). This classification drives everything from head spacing to water supply requirements.
- Coverage area per head: Light hazard allows up to 225 square feet per standard spray head. Ordinary hazard allows up to 130 square feet.
- Obstruction rules: Sprinkler heads must be positioned so that obstructions (ductwork, beams, light fixtures) do not block the spray pattern. The standard includes specific distance and deflector requirements.
- Head clearance: Standard spray heads need 1 to 12 inches of clearance between the deflector and the ceiling. Sidewall heads have different rules.
- System riser requirements: Each system needs an accessible riser with a main drain connection, inspector’s test connection, and water flow alarm.
NFPA 13R: Residential Occupancies Up to Four Stories
NFPA 13R is a more relaxed standard for apartments, condos, hotels, and other residential buildings up to four stories. It allows omitting sprinklers in certain areas like bathrooms, closets, and attics where fire risk is lower.
NFPA 13D: One- and Two-Family Dwellings
NFPA 13D is the simplest standard, designed for houses and small residential buildings. It allows the use of the domestic water supply (no fire pump or dedicated main needed in most cases), multipurpose piping, and smaller pipe sizes.
NFPA 25: Inspection, Testing, and Maintenance
While not an installation standard, NFPA 25 defines ongoing requirements. Understanding these requirements during installation ensures the system can be properly maintained. Key points:
- Install inspector’s test connections at the hydraulically most remote point
- Provide accessible main drain connections
- Label all valves and control points
- Ensure test drains discharge to visible, safe locations
Local Amendments
Here is the critical thing: your local Authority Having Jurisdiction (AHJ), usually the fire marshal, may adopt modified versions of NFPA standards. They can add requirements, change spacing rules, or mandate specific products. Always verify local amendments before starting design work.
The Installation Process: Step by Step
1. Design and Plan Review
Before any pipe goes in, the system must be designed by a qualified designer (NICET Level III or IV, or a licensed fire protection engineer) and submitted to the AHJ for plan review. The submittal includes:
- Floor plans with head locations
- Riser diagrams
- Hydraulic calculations
- Product data sheets for all components
- Water supply test data
Plan review can take 2 to 6 weeks depending on the jurisdiction. Build this into your project schedule.
2. Water Supply Testing
Before design begins, test the available water supply. This means a flow test on the nearest hydrant or a test of the building’s fire pump. The test gives you static pressure, residual pressure at a known flow, and the supply curve. Without accurate water supply data, the hydraulic calculations are meaningless.
3. Rough-In Coordination
Sprinkler rough-in happens alongside other MEP trades. Coordination is critical because:
- Sprinkler mains need clear paths through the building
- Head locations must account for HVAC ductwork, electrical conduit, and lighting
- Seismic bracing needs structural attachment points
- Pipe routing affects ceiling heights and plenum space
In a well-run project, the GC coordinates all MEP trades through a combined ceiling plan or BIM model. In a poorly run project, the sprinkler fitter shows up and finds ductwork in the way.
4. Pipe Installation
Install risers first, then feed mains, cross mains, and branch lines. Key installation practices:
- Support all pipe per NFPA 13 hanger requirements
- Install seismic bracing as you go
- Use proper joint methods (threaded, grooved, or solvent-welded for CPVC)
- Keep pipe interiors clean; debris in the pipe can clog heads
- Install drain points at all low spots in the system
5. Head Installation
Sprinkler heads go in after the ceiling grid is in place (for concealed and recessed heads) or during rough-in (for exposed heads). Important details:
- Use the correct head type and temperature rating for each location
- Maintain proper clearance from the ceiling
- Do not paint sprinkler heads (paint can prevent activation)
- Protect heads from construction damage with head guards or covers
- Verify that no obstructions block the spray pattern
6. Hydrostatic Testing
Before the system goes live, fill it with water and pressurize it to 200 PSI (or 50 PSI above working pressure, whichever is higher) for two hours. No leaks allowed. This test must be witnessed by the AHJ or their representative.
7. Final Inspection and Acceptance
The fire marshal or AHJ inspector will check:
- Head placement and spacing against approved plans
- Hanger and brace installation
- Valve accessibility and labeling
- Inspector’s test and main drain function
- Alarm activation (flow switch triggers the fire alarm)
- As-built drawings match the installation
Common Installation Mistakes
Installing Heads Too Close to Obstructions
A sprinkler head that is too close to a beam, duct, or light fixture will have a blocked spray pattern. NFPA 13 includes specific tables for minimum distances from obstructions. Ignoring these tables is one of the top reasons inspectors reject systems.
Wrong Temperature Rating
Standard heads are rated at 155 degrees Fahrenheit, but areas near heat sources (skylights, unit heaters, kitchens, attics) need higher-rated heads (200 to 286 degrees). Using the wrong temperature rating means the head either activates too easily or not at all.
Missing Escutcheon Plates
Every head that passes through a ceiling needs an escutcheon plate (the decorative ring). Missing plates are a code violation because they affect the head’s spray pattern and allow fire to pass through the ceiling.
Inadequate Freeze Protection
Wet pipe in an unheated attic or loading dock will freeze and burst. Either use a dry system, insulate the pipe with heat trace, or ensure the space is heated to at least 40 degrees. Freeze-related pipe breaks are among the most expensive sprinkler failures.
Poor Coordination With Other Trades
When the sprinkler contractor installs pipe based on plans, but the HVAC contractor moves a duct after the fact, you end up with heads that are obstructed or pipe that does not fit. This is a project management problem, not a sprinkler problem.
Tracking Sprinkler Installation on Your Projects
Fire sprinkler work involves long lead times for plan review, precise coordination with other trades, scheduled inspections, and detailed documentation. Losing track of any piece means delays.
Projul’s scheduling and project management tools help you coordinate sprinkler rough-in with other trades, track inspection dates, store approved plans and test reports, and keep everyone on the same page from design through final acceptance.
If you are managing construction projects and want to see how Projul handles multi-trade coordination, book a demo or check pricing.
Quick Reference: Fire Sprinkler Installation Checklist
- Verify local code requirements and AHJ amendments
- Complete water supply flow test
- Submit design for plan review (allow 2 to 6 weeks)
- Coordinate pipe routing with all MEP trades
- Install risers, mains, and branch lines per approved plans
- Support and brace all pipe per NFPA 13
- Install heads with correct type, temperature rating, and clearance
- Perform hydrostatic test at 200 PSI for 2 hours
- Test alarm connections (flow switch to fire alarm panel)
- Schedule and pass final inspection with AHJ
- Provide as-built drawings and maintenance instructions to owner
Final Thoughts
Fire sprinkler installation is a specialty trade that demands precision, code knowledge, and tight coordination with every other system in the building. Whether you are a GC managing a sprinkler sub or a fire protection contractor running your own crew, understanding these fundamentals keeps your projects on track and your buildings safe.
The systems are not complicated in concept. Water goes through pipes to heads that open when they get hot. But the details of getting the right water, to the right place, at the right pressure, with the right coverage, are what make this work a true trade skill.
Get the details right, document everything, and coordinate early. Your inspections will go smoother and your buildings will be safer for it.
Frequently Asked Questions
What is the difference between wet and dry fire sprinkler systems?
How much does it cost to install a fire sprinkler system?
What NFPA standard covers fire sprinkler installation?
How far apart should fire sprinkler heads be spaced?
Do fire sprinkler pipes need to be insulated?
Who can install fire sprinkler systems?
How often do fire sprinkler systems need inspection?
Can fire sprinklers go off accidentally?
Related Articles

Construction Punch List Software Comparison Guide: What Actually Matters
Not all punch list software is built the same. This guide breaks down what construction companies should actually look...
Read More →
Concrete Saw Cutting Guide: Wet vs Dry, Blade Selection, Depth Control, and Joint Timing
Concrete saw cutting is one of those skills that separates a clean, professional slab from one that cracks in all the...
Read More →
10 Best Construction Management Software in 2026
Picking the right construction management software can save you thousands of hours and dollars every year. Here are the...
Read More →