Home Addition Management for GCs: The Complete Guide | Projul
Home additions sit in a sweet spot for general contractors. The margins can be strong, the work is interesting, and homeowners are usually motivated buyers who have already decided to invest in their property instead of moving. But additions also come with a unique set of headaches that new construction and simple remodels don’t. You’re building new space and connecting it to an existing structure, which means you’re dealing with two sets of problems at once.
If you’ve been running remodels and want to move into additions, or if you’re already building them and want to tighten up your process, this guide covers the things that actually matter on the job.
Assessing the Existing Structure Before You Quote
The number one mistake GCs make on addition projects is quoting before they really understand what they’re working with. A new build starts with a clean slab or foundation. An addition starts with someone else’s work, and you have no idea what’s hiding behind those walls until you open them up.
Before you put a number on paper, you need to spend real time on the existing structure. That means getting into the crawlspace or basement and looking at the foundation. It means checking the roof framing to understand how the new roofline will tie in. It means figuring out where the electrical panel is, what capacity it has, and whether the existing plumbing can handle additional fixtures.
Here’s what your pre-bid assessment should cover at minimum:
- Foundation condition and type. Is it poured concrete, block, or stone? Any cracking or settling? If the existing foundation has issues, you need to address those before or during the addition. Our foundation repair guide covers what to look for and when to bring in a structural engineer.
- Roof structure and drainage. How will the new roof connect? Is there enough pitch to keep water moving? Where do the existing gutters and downspouts go?
- Electrical service capacity. A 100-amp panel that’s already full won’t support a new master suite with electric heat. Budget for a panel upgrade if needed.
- Plumbing access and capacity. Where’s the main sewer line? What size is it? Can it handle additional bathrooms or a kitchen?
- HVAC system. Can the existing system serve the new space, or does the addition need its own system?
Skip this assessment and you’re guessing. Guessing leads to bad estimates, and bad estimates lead to lost money or lost clients. A solid estimating process that accounts for existing conditions will save you every time.
Permits, Zoning, and the Red Tape Nobody Likes
Nobody got into construction because they love paperwork. But on addition projects, the permitting and zoning side can make or break your timeline and your budget. You need to understand both before you sign a contract.
Zoning comes first. Before you even think about building permits, check the local zoning requirements. Setback rules, lot coverage limits, and height restrictions can kill a project before it starts. If the homeowner wants a 400-square-foot addition on the back of the house but it would put the structure within 5 feet of the property line, you’ve got a problem. Our zoning and land use guide breaks down what to check and how to handle variance requests.
Then come the permits. Most addition projects need a building permit at minimum, plus separate permits for electrical, plumbing, and mechanical work. Some jurisdictions require a demolition permit if you’re removing existing walls or structures. The permits guide walks through the full process, but here are the key things to keep in mind for additions specifically:
- Plan reviews take time. Residential additions often require stamped structural drawings, and plan review can take 2 to 8 weeks depending on your jurisdiction. Build this into your timeline.
- Inspections have a sequence. You’ll typically need foundation, framing, rough MEP, insulation, and final inspections. Miss one and you’re tearing out finished work.
- HOA approvals are separate. If the home is in an HOA community, you may need architectural review board approval before the city will even accept your permit application.
- Setback surveys may be required. Some jurisdictions want a survey showing the proposed addition meets all setback requirements before they’ll issue the permit.
The GC who handles this upfront, builds the timeline around it, and communicates it clearly to the homeowner is the GC who keeps the project moving. The one who wings it ends up with angry clients waiting on a permit that should have been submitted six weeks ago.
Foundation and Structural Tie-Ins: Where Additions Get Tricky
This is where addition work separates itself from everything else in residential construction. You are connecting a new structure to an existing one, and that connection has to be solid. Not just structurally, but also for waterproofing, thermal performance, and aesthetics.
Foundation connections depend entirely on the situation. If the existing home sits on a full basement and the addition will also have a basement, you’re tying new foundation walls into existing ones. That typically means excavating alongside the existing foundation, doweling rebar into the old concrete, and pouring the new walls against it. If the existing home is on a slab and the addition is also slab-on-grade, you may pour a new slab with an expansion joint between old and new.
The critical thing is getting a structural engineer involved early. Don’t guess at foundation connections. The engineer will specify the connection method, rebar sizing and spacing, and any special requirements for the soil conditions on that lot. This is one area where skimping on professional fees will cost you ten times over if something goes wrong.
Roof tie-ins are the other big structural challenge. The new roofline has to integrate with the existing one, and that means:
- Matching the pitch and style so it looks intentional, not tacked on
- Properly flashing the connection points to prevent water intrusion
- Tying new rafters or trusses into the existing roof structure
- Handling the valley or ridge connection where old meets new
Water is going to find the weakest point in your tie-in. If you don’t detail the flashing, step flashing, and counter flashing correctly at every roof-to-wall and roof-to-roof connection, you’ll be getting a callback. And water damage callbacks on an addition are expensive.
Wall connections are often overlooked. Where the new framing meets the existing wall, you need a solid mechanical connection. But you also need to think about differential settlement. The existing house has already settled. The new addition hasn’t. If you rigidly connect the two without accounting for this, you’ll get cracking at the connection point within a year or two. Talk to your engineer about this. Sometimes a slip joint or flexible connection is the right answer.
Managing the Schedule When People Are Living in the House
Here’s something that makes additions fundamentally different from new construction: there’s usually a family living in the house while you’re working. That changes everything about how you plan and run the job.
Dust and debris control is not optional. You need proper barriers between the work zone and the living space from day one. That means poly sheeting, zip walls, or temporary partitions with sealed edges. If you’re demo-ing an exterior wall to connect the addition, plan exactly when that wall opens up and how quickly you can get it closed back in. Nobody wants their living room exposed to the elements overnight.
Noise and work hours matter. On a new build, your crew can show up at 6:30 AM and run saws all day. When there’s a family with kids on the other side of the wall, you need to set clear expectations about start times, loud work windows, and weekend schedules. Put it in the contract.
Utility disruptions need advance notice. When you tie in new plumbing, there will be water shutoffs. When you connect to the panel, there will be power shutoffs. Give the homeowner at least 24 hours notice before any utility disruption, and try to schedule them during work hours when the family may be out of the house.
A good scheduling tool is worth its weight on addition projects. You need to coordinate subs around the homeowner’s life, sequence work to minimize disruption, and keep the whole team on the same page about what’s happening when. Paper schedules and text message chains fall apart fast on these jobs.
The biggest scheduling pitfall on additions is the tie-in phase. There’s usually a period where you’ve opened the existing house to connect the new space, and the home is more vulnerable to weather, pests, and security issues. Plan this phase carefully. Have materials staged and ready. Get the crew you need committed for those days. Don’t start the tie-in on a Friday before a rainy weekend.
Scope Creep and Client Communication: The Real Profit Killers
If you’ve built more than a couple of additions, you already know this: the scope will try to grow. It always does. The homeowner sees the framing going up and suddenly wants to move a window. The plumber opens a wall and finds old galvanized pipe that should be replaced. The client’s spouse decides the addition should have heated floors.
Thousands of contractors have made the switch. See what they have to say.
Some of these changes are necessary. Some are nice-to-haves. All of them cost money and time. And if you don’t have a system for handling them, they will eat your margin alive.
Start with a bulletproof scope document. Before you sign the contract, the scope of work should be detailed enough that both you and the homeowner can point to it and agree on what’s included and what’s not. Specify finishes, fixture allowances, and exactly where the addition starts and ends. Vague scopes create disputes. Our scope creep guide has a framework for locking this down.
Use a formal change order process. Every change, no matter how small, gets documented with a price and a timeline impact. The homeowner signs it before the work happens. No exceptions. This protects both parties and keeps the project honest.
Communicate proactively. Don’t wait for the homeowner to ask what’s going on. Give them regular updates, even when there’s nothing exciting to report. A weekly email or a quick walkthrough goes a long way toward keeping trust high. When issues come up, and they always do, the client who’s been getting regular communication handles it much better than the one who hasn’t heard from you in two weeks. Check out our client communication guide for a system that works.
Set expectations about the messy middle. Every addition project has a phase that looks terrible. The exterior wall is open, the framing is rough, there’s dust everywhere, and the homeowner is questioning their life choices. Prepare them for this. Show them the schedule, explain what comes next, and remind them that this is normal. The GCs who keep clients calm through the messy middle are the ones who get referrals.
Here’s a reality check: most callbacks and bad reviews on addition projects aren’t about the quality of the work. They’re about communication failures. The homeowner expected something that wasn’t in the scope. Nobody told them about the three-week permit delay. The sub showed up at 7 AM on a Saturday without warning. These are all preventable problems.
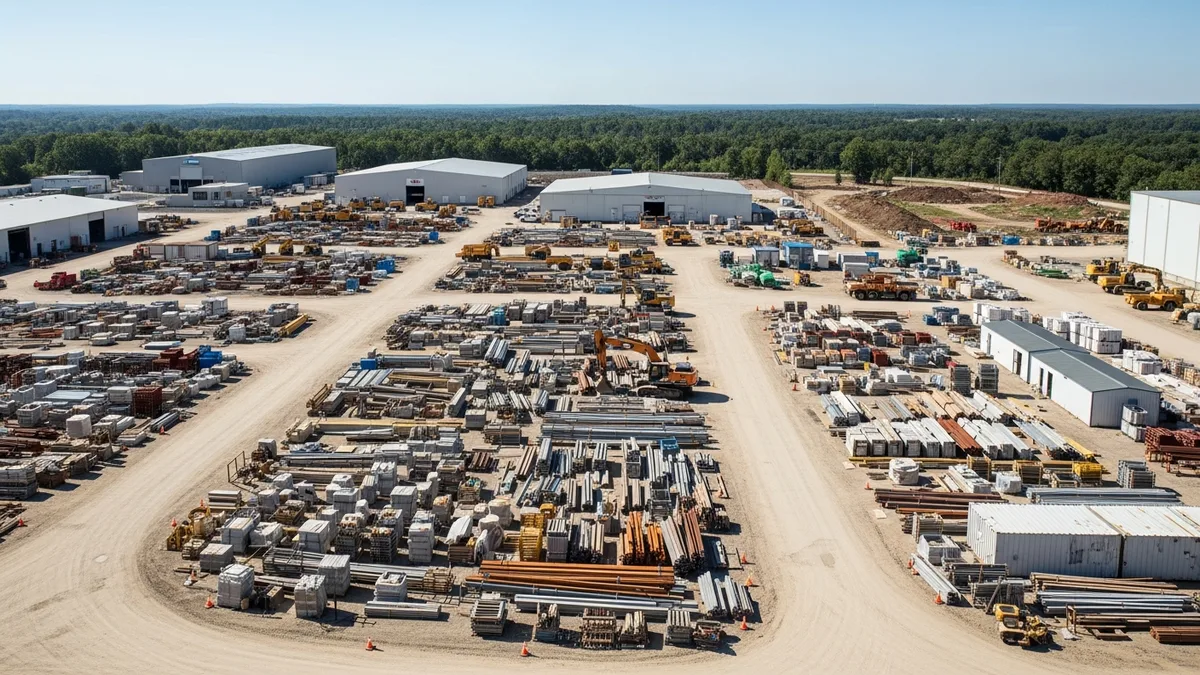
Getting Your Numbers Right: Estimating Additions Without Leaving Money on the Table
Estimating an addition is harder than estimating a new build of the same size. That’s just the truth. You have more unknowns, more tie-in work, and more variables that can change once the project starts. Here’s how to build estimates that protect your margin without pricing yourself out of the job.
Break the estimate into clear phases. Don’t give the homeowner one lump number. Break it down:
- Site prep and foundation. Excavation, forming, rebar, concrete, waterproofing, and backfill. Include any demo of existing exterior elements like decks, patios, or landscaping that’s in the way.
- Framing and structural tie-in. All rough framing for the addition plus the connection to the existing structure. Include the roof tie-in, any structural steel, and engineered lumber.
- MEP rough-ins. Plumbing, electrical, and HVAC rough-in for the new space plus all tie-ins to existing systems. Include any panel upgrades or new HVAC equipment.
- Exterior finish. Roofing, siding, windows, doors, and all exterior trim. Include matching the existing home’s materials and style.
- Interior finish. Drywall, paint, flooring, trim, cabinets, countertops, fixtures, and all finish work.
- Site restoration. Landscaping repair, driveway repair, and any exterior work needed to make the property look right again.
Build in contingency for the unknowns. On a new build, a 5% contingency might be fine. On an addition, you need 10% to 15%. You don’t know what’s behind those walls until you open them. Old wiring, termite damage, out-of-level floors, undersized headers. Plan for surprises because there will be some.
Don’t forget the match work. One of the most expensive and time-consuming parts of an addition is making the new space look like it was always part of the house. Matching existing siding that’s been weathered for 20 years, blending new roofing with old, getting trim profiles to align. This work takes time and skilled labor. If you underestimate it, you’ll either eat the cost or deliver a result that looks like an obvious add-on.
Price the disruption factor. Working around an occupied home is slower than working on a vacant lot. Your crew can’t just stack materials anywhere. They need to protect finished surfaces, clean up more frequently, and work around the homeowner’s schedule. Factor this into your labor hours. A good rule of thumb is adding 10% to 20% to your labor estimate compared to the same scope on a new build.
Use real numbers from past projects. If you’ve built additions before, your historical costs are your best estimating tool. Track what you actually spent on past jobs, not what you estimated, and use those numbers to calibrate your future bids. Estimating software that lets you build from historical data makes this a lot easier than spreadsheets.
The goal is an estimate that’s accurate enough to win the job and detailed enough to protect you when things change. Because on additions, things always change.
Pulling It All Together
Home additions are not simple projects, but they are incredibly rewarding when you run them well. The GCs who consistently profit on additions share a few traits: they assess existing conditions thoroughly before quoting, they handle permits and zoning proactively, they get engineers involved early for structural connections, they communicate constantly with the homeowner, and they manage scope changes with discipline.
If you’re building out your addition process or looking for better ways to manage these projects, take a look at how Projul can help you keep estimates tight, schedules on track, and communication flowing. The tools you use matter, especially on projects this complex.
Ready to see how Projul can work for your crew? Schedule a free demo and we will walk you through it.
The bottom line? Know what you’re getting into before you bid it. Plan the tie-in work carefully. Communicate more than you think you need to. And always, always build in contingency for what’s hiding behind those walls.
Frequently Asked Questions
How long does a typical home addition take to build?
What permits are required for a home addition?
How do you tie a new addition into an existing foundation?
What is the biggest risk on a home addition project?
How should a GC estimate a home addition project?
Related Articles

Best Solar Contractor Software: Managing Installations and Proposals
Solar contractors face unique challenges that generic construction software can't handle. From proposals and permits to...
Read More →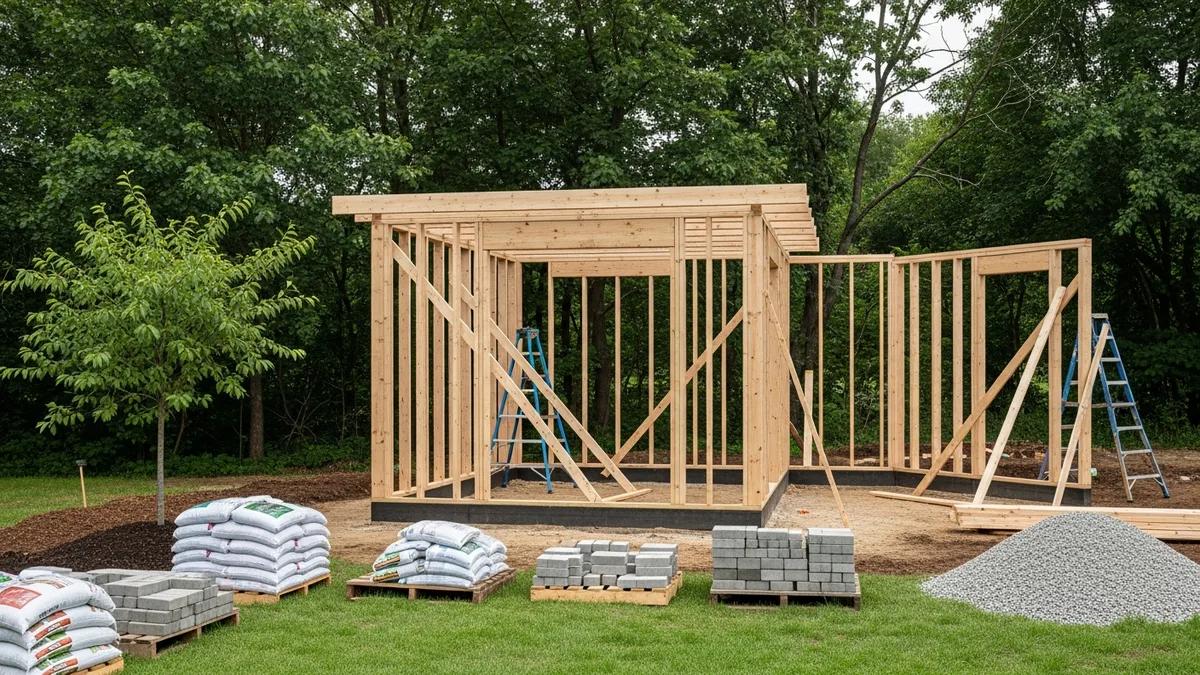
Construction Pool Building Guide: What Every GC Needs to Know
Pool construction is one of the most coordination-heavy projects a GC can take on. This guide breaks down what you...
Read More →
Construction Prefabrication and Modular Building Guide: What Contractors Need to Know
Prefabrication and modular construction are changing how contractors build. This guide breaks down prefab vs modular vs...
Read More →